User Manual
JA

Interactive user guide

Harmony A1 Setup Guide

Connect one source. Play it through every speaker.

Follow three steps to start the Harmony A1 Auracast speaker system.

1

Step 01 · Power

Connect power

Power Harmony A1 transmitter before connecting an audio source.

TaskTurn on the transmitter.

Connect and switch on

Connect the transmitter to power using a USB-C cable and power adapter. Then switch the transmitter to ON.

DoneThe transmitter indicators turn on.
If notReseat the power cable. Try another power adapter and outlet.
2

Step 02 · Audio source

Choose your source

Choose the device that sends audio to the transmitter.

TaskSelect one source below.

3

Step 03 · TV / Media Device

Connect Optical

TaskConnect Optical Out and set the TV audio format to PCM.

  1. Press AUX/OPT on the transmitter to select OPT input. The OPT indicator blinks red.
  2. Remove the clear caps from both ends of the optical cable.
  3. Connect Optical Out on the TV/source to Optical on the transmitter.
  4. On the TV/source, select Optical output and set the format to PCM.
DoneThe audio indicator responds and listeners hear the TV audio.
If notUse Optical Out, not In. Set the format to PCM—not Dolby, DTS, Bitstream, or Auto.
Not sure how to set PCM?Open the Brand-by-Brand TV Guide →
3

Step 03 · Mixer / AV System

Connect analog audio

TaskMatch the mixer output to the correct cable.

Choose the correct output and cable. The wrong cable may cause low volume, missing vocals, or poor sound quality.
  1. Select AUX inputPress AUX/OPT on the transmitter. The AUX indicator blinks red.
  2. Check the source outputLook for XLR, 6.35 mm, RCA, or 3.5 mm output ports.
  3. Choose your outputSelect the matching option below.

How many XLR outputs will you use?

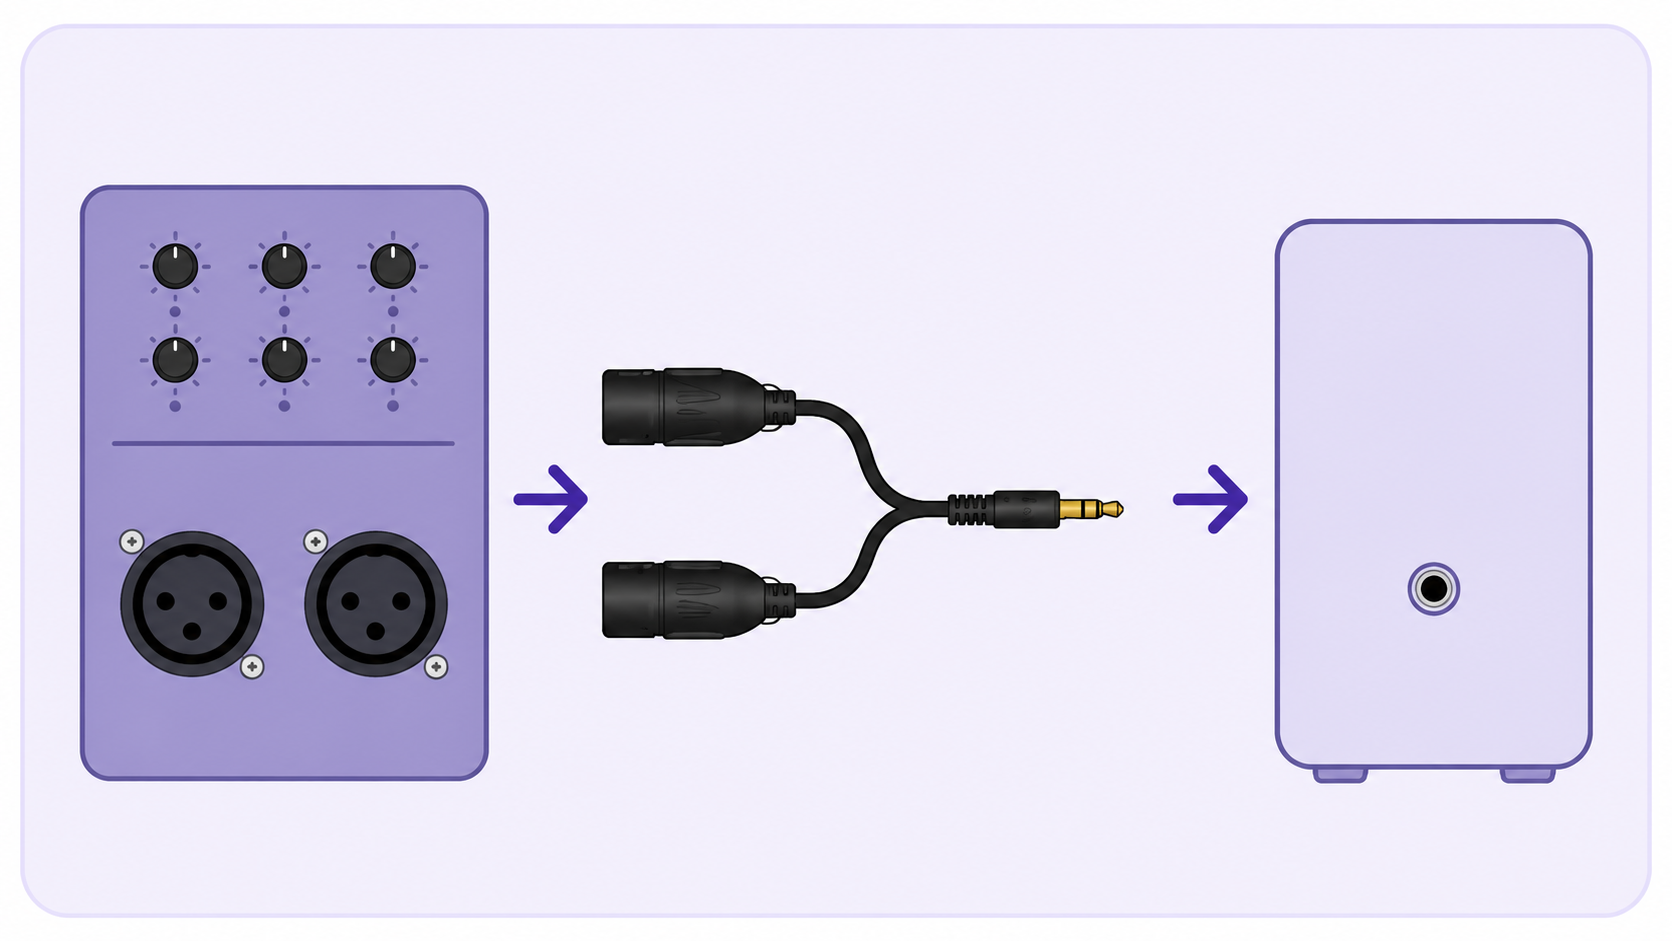
Dual XLR Output

  1. Use a dual XLR female-to-unbalanced 3.5 mm TRS cable.Wrong cable? It may cause low volume or missing vocals.
  2. Connect the XLR plugs to mixer Output L / R.
  3. Connect the 3.5 mm plug to the transmitter AUX In.
Mixer OUTPUT L / RDual XLR female-to-3.5 mm TRS cabletransmitter AUX IN
Dual XLR mixer outputs connected to transmitter AUX In
The transmitter rear panel; the AUX input is the second port from the left

Stereo mixer output recommended

Done: the transmitter audio indicator responds and listeners hear clear stereo audio.
If not: confirm both plugs use mixer Output L / R, unmute the output, and lower the mixer level.
Cable not included. Buy separately if needed →

Single XLR Output

  1. Use a single XLR female-to-unbalanced 3.5 mm TRS cable.Mono output: A single XLR carries mono audio.
    Wrong cable? It may cause low volume or poor sound quality.
  2. Connect the XLR plug to the mixer Output.
  3. Connect the 3.5 mm plug to the transmitter AUX In.
Mixer OUTPUTSingle XLR female-to-3.5 mm TRS cabletransmitter AUX IN
Single XLR mixer output connected to transmitter AUX In
The transmitter rear panel; the AUX input is the second port from the left

Mono output only

Done: the transmitter audio indicator responds and listeners hear the mono source audio.
If not: confirm the cable is unbalanced 3.5 mm TRS, the mixer jack is an output, and the output is unmuted.
Cable not included. Buy separately if needed →

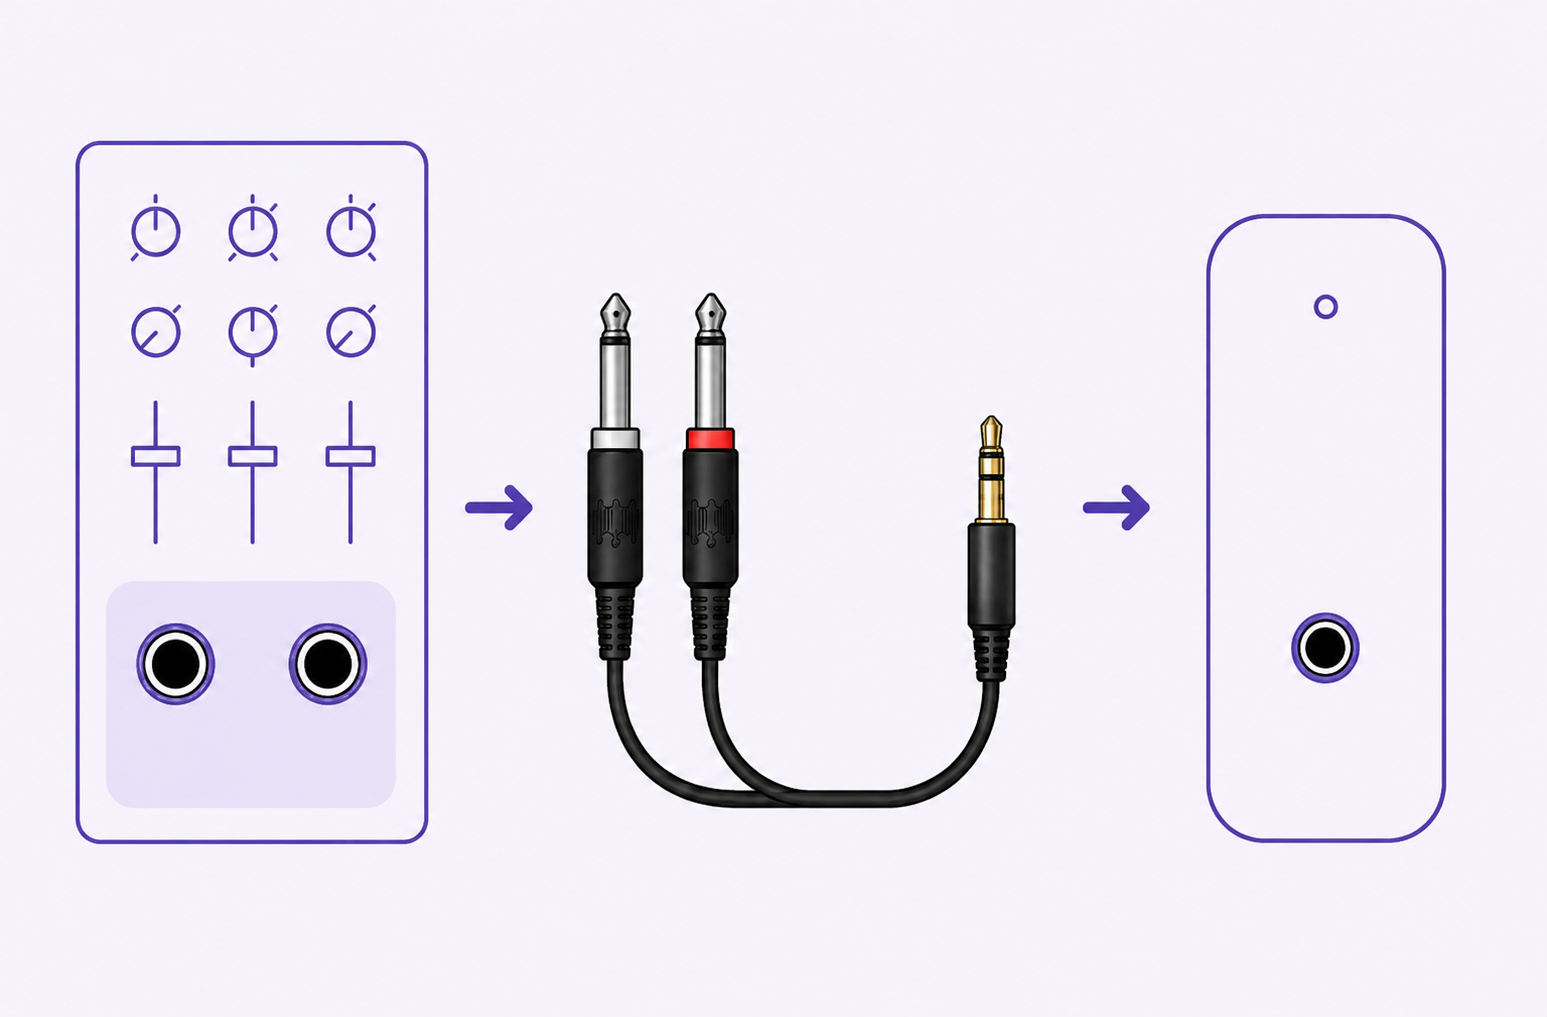
6.35 mm Output

  1. Use the included dual 6.35 mm-to-3.5 mm cable.Wrong cable? It may cause poor sound quality.
  2. Connect the two 6.35 mm plugs to mixer Output L / R.
  3. Connect the 3.5 mm plug to the transmitter AUX In.
Mixer OUTPUT L / RDual 6.35 mm-to-3.5 mm cabletransmitter AUX IN
Dual 6.35 mm mixer outputs connected to transmitter AUX In
The transmitter rear panel; the AUX input is the second port from the left

Stereo mixer output recommended

DoneThe audio indicator responds and listeners hear clear stereo audio.
If not: connect both plugs to Output L / R, unmute the mixer output, and lower the source level if sound is distorted.

RCA / 3.5 mm Output

Choose the matching output. Connect only an audio output to the transmitter AUX In.
RCA Output

Connect RCA Out to the transmitter AUX In with an RCA-to-3.5 mm cable.
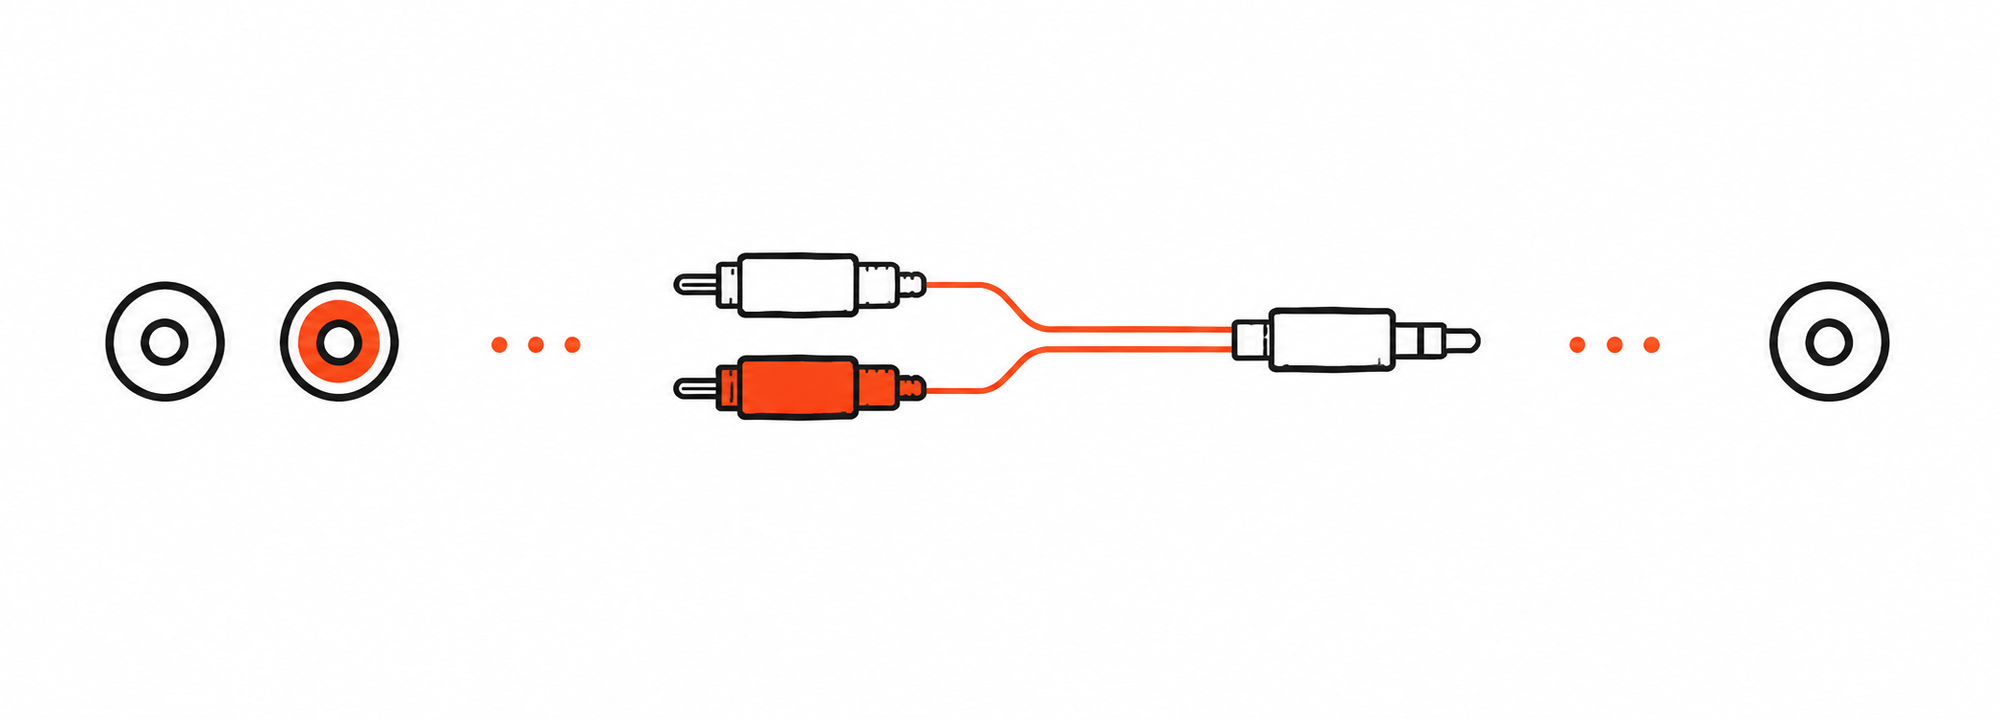
Source RCA OUT L / RRCA-to-3.5 mm cabletransmitter AUX IN
RCA left and right outputs connected to transmitter AUX In
The transmitter rear panel; the AUX input is the second port from the left
RCA cable not included. Buy separately if needed →
3.5 mm Output

Connect 3.5 mm Out to the transmitter AUX In with the included 3.5 mm-to-3.5 mm cable.
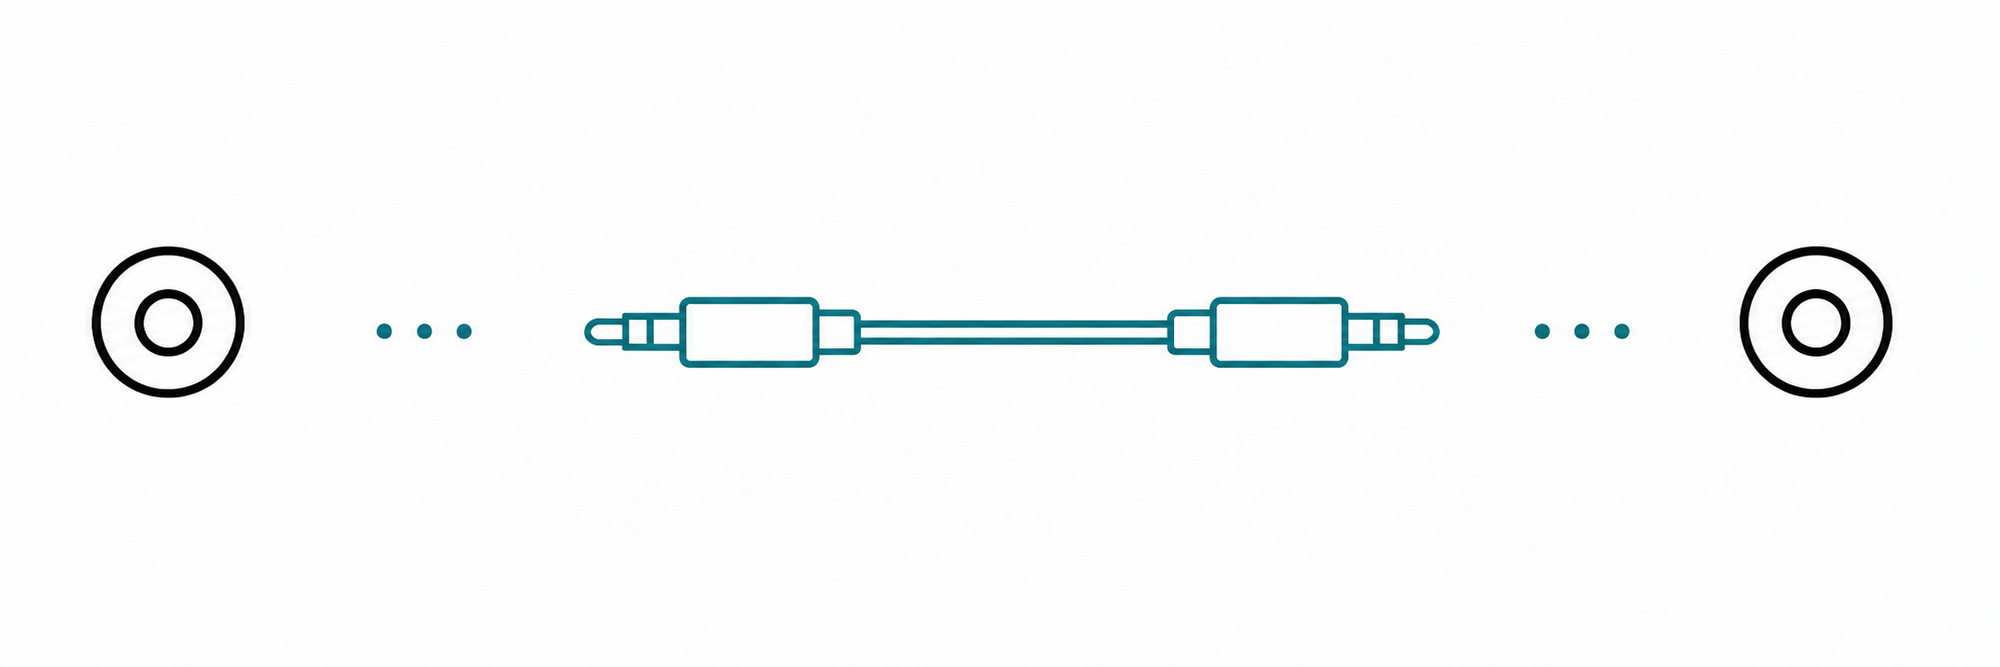
Source 3.5 mm OUT3.5 mm-to-3.5 mm cabletransmitter AUX IN
3.5 mm audio output connected to transmitter AUX In
The transmitter rear panel; the AUX input is the second port from the left
DoneThe audio indicator responds and listeners hear clear audio.
If not: use an audio output—not an input—then unmute the source and raise its volume gradually.
3

Step 03 · Phone / Tablet / Computer

Connect with Bluetooth

TaskPair the audio source with the transmitter Bluetooth input.

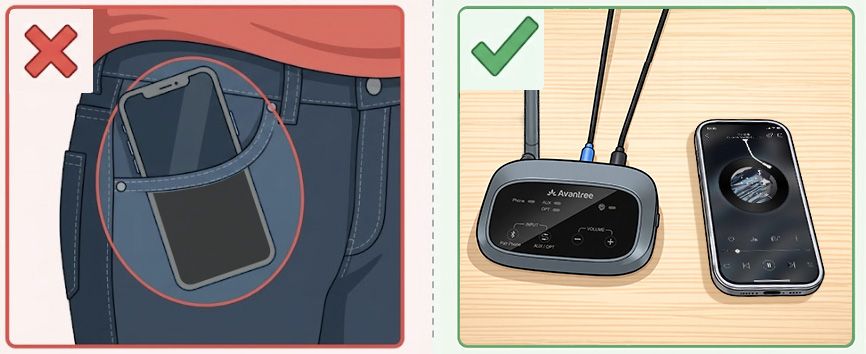
Keep your phone close to the transmitter while pairing.
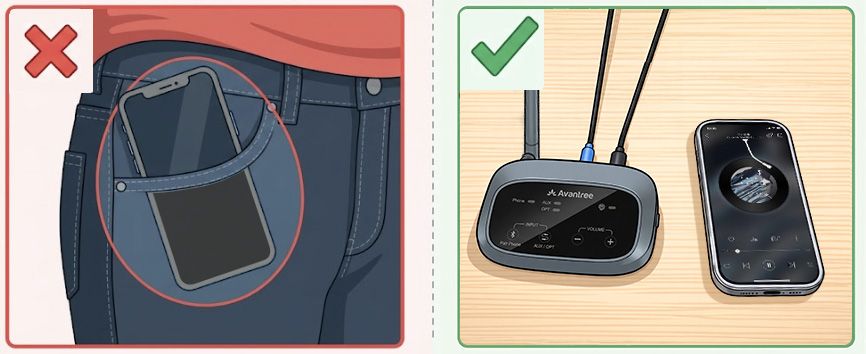
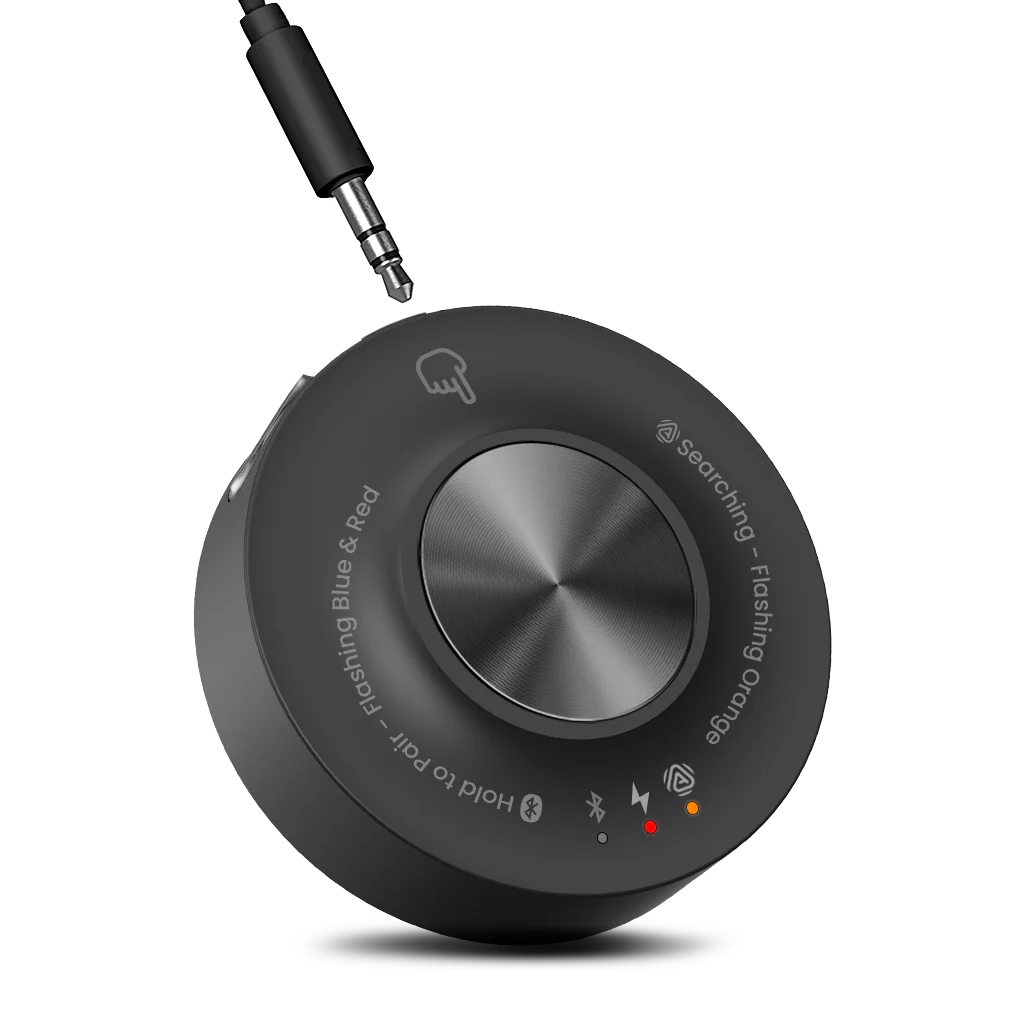
  1. Start pairing: press Phone/Pair on the transmitter. Its indicator blinks red and blue.
  2. Connect your source: open Bluetooth settings and select the transmitter.
  3. Play audio on the phone, tablet, or computer.
Keep the phone near the transmitter rather than in a pocket while pairing
For a better experience: use a wired audio input for best stability. Bluetooth range is approximately 10–15 m (30–50 ft).
DoneThe audio indicator responds and listeners hear the source audio.
How It Works: Bluetooth sends audio to the transmitter. Listeners receive it through Auracast.
If notThe transmitter is not listed? Turn off Bluetooth on its previous source. Start pairing again and move the devices closer.
3

Step 03 · Listen

Listen from the speakers

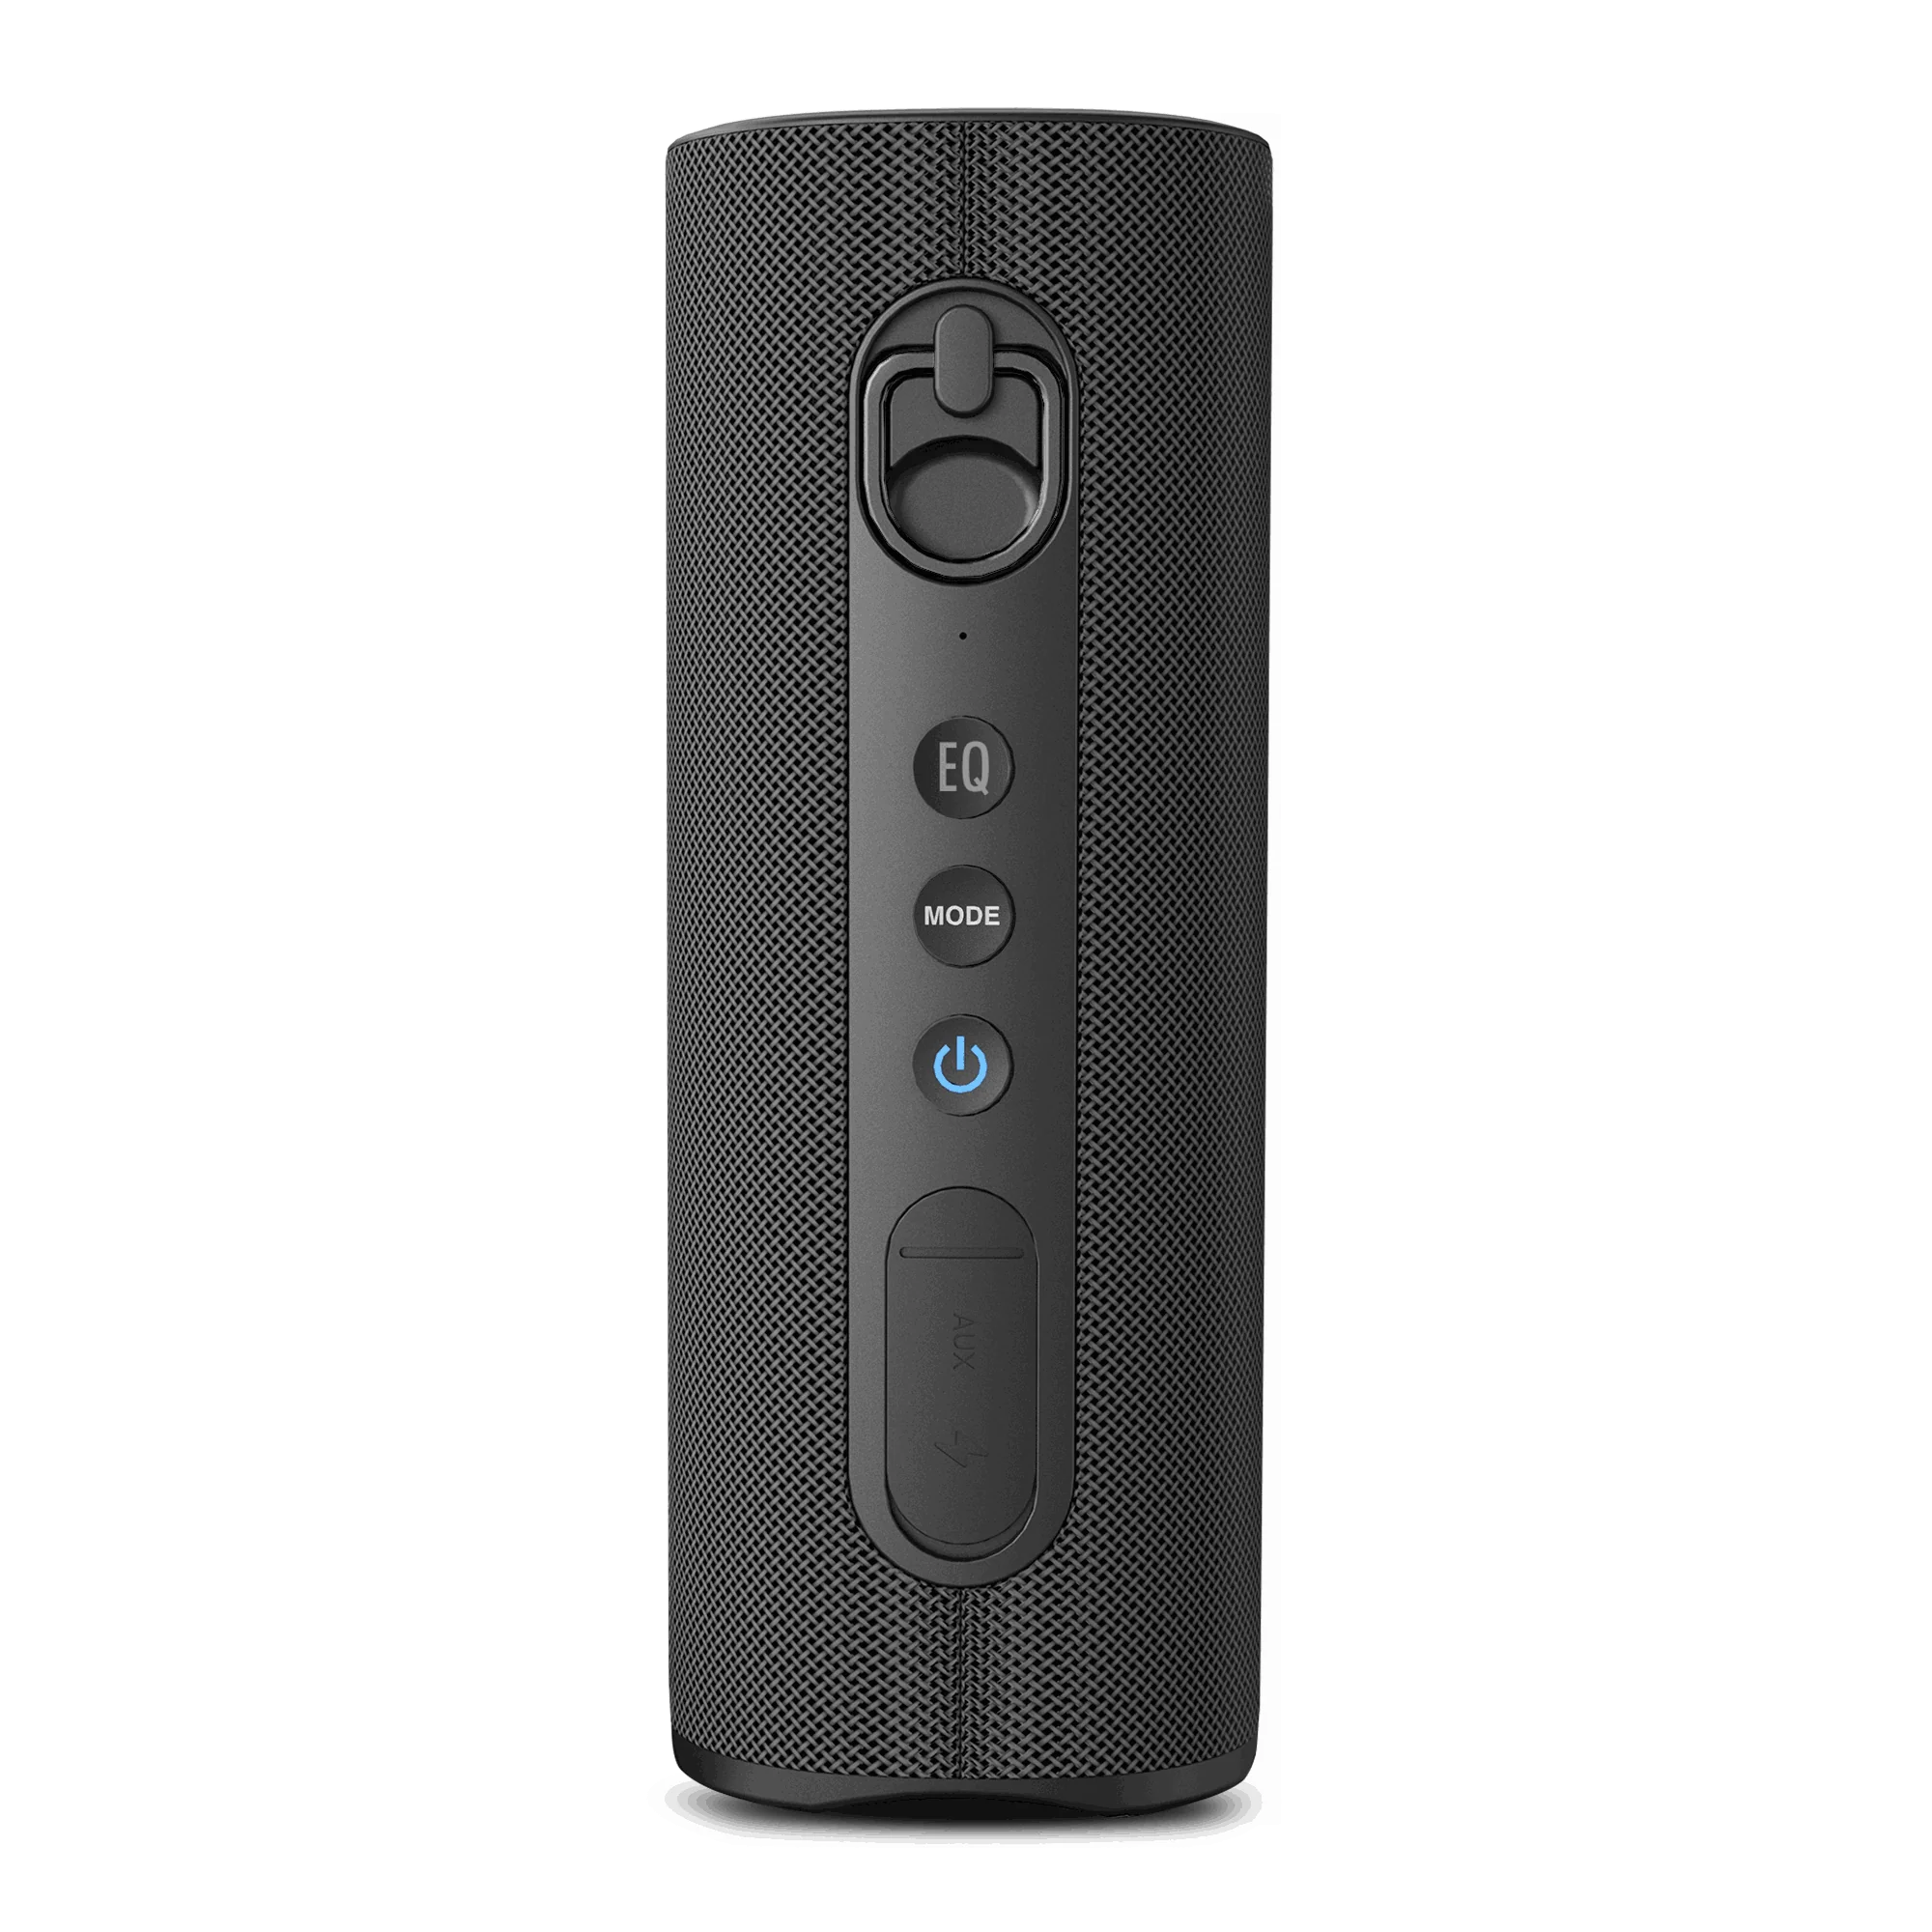
  1. Turn on each Harmony A1 speaker.
  2. Play audio from the connected source.

Video: turn on the speakers and check that each MODE light is solid orange.

DoneEach MODE light is solid orange, and all speakers play the same audio.
If notIf a MODE light is not orange, double-press that speaker's MODE button. Still no audio? Use Fix a problem.

Placement

Placement tips

Transmitter

  • Place in the center.
  • Clear line of sight.
  • Up to 330 ft.

Phone

  • Keep next to transmitter.
  • Do not keep in pocket.
Correct: keep the phone next to the transmitterIncorrect: do not keep the phone in a pocket

Optional expansion

Add speakers

Add more Auracast speakers to expand your system.

Other brands

  • Use phone app to join Auracast.
  • Auto-connect not guaranteed.

Fix a problem

Start with what you see or hear

No sound from any speaker

Problem: all speakers are silent.

Possible cause: the wrong transmitter input is selected, the source is not playing, or optical audio is not PCM.

Solution: play audio, select the matching OPT, AUX, or Bluetooth input, then confirm the source output. For optical TV audio, set the digital format to PCM.

Expected result: the transmitter receives audio and every joined speaker plays it. If not, test a different input method or cable.

One speaker has no sound

Problem: other speakers play, but one is silent.

Possible cause: that speaker is off, out of range, or not in Auracast mode.

Solution: charge and turn on the silent speaker, move it near the transmitter, then double-press MODE if its MODE light is not orange.

Expected result: the MODE light becomes solid orange and the speaker plays the same audio. If not, power the speaker off and on near the transmitter.

Audio cuts out or becomes unstable

Problem: audio stops briefly, crackles, or disconnects.

Possible cause: walls, people, interference, or an excessive distance is weakening the wireless path.

Solution: move the transmitter higher or more centrally, reduce obstructions, and move the affected speaker closer. For Bluetooth input, keep the phone within 10–15 m / 30–50 ft of the transmitter.

Expected result: audio remains continuous. If Bluetooth remains unstable, use optical or AUX input.

Bluetooth source cannot connect

Problem: Harmony A1 does not connect from the source's Bluetooth menu.

Possible cause: the transmitter is not in Bluetooth pairing mode or is already connected to another source.

Solution: press the transmitter Bluetooth control until its indicator blinks red and blue. Disconnect other nearby sources, then select Harmony A1 again.

Expected result: the source shows connected and its audio plays through the speakers. If not, restart both devices and retry nearby.

Optical TV audio is silent or distorted

Problem: the optical cable is connected but audio is missing or unclear.

Possible cause: the TV is using Dolby, Bitstream, or another unsupported digital format.

Solution: select Optical as the TV output and set Digital Audio Format to PCM. Confirm the cable is connected to the TV's Optical Out port.

Expected result: clear TV audio plays through all joined speakers. If not, reseat or replace the optical cable.

Speaker turns off when no audio is playing

Problem: a speaker powers off after an idle period.

Possible cause: the documented default behavior is automatic power-off after about 60 minutes without audio, even when a broadcast is joined.

Solution: resume audio and power the speaker on. For always-on use while plugged in, check the official Harmony A1 firmware page for the required update.

Expected result: playback resumes. Always-on behavior depends on verified firmware availability.

Reference

Harmony A1 states and limits

Match each light color with its pattern; color alone is not enough.

Transmitter input

OPT · blinking red
Optical input selected and awaiting or receiving the connected source.
AUX · blinking red
3.5 mm analog input selected.
Red + blue · blinking
Bluetooth input is ready to pair.

Speaker mode

MODE · solid orange
Speaker joined the Auracast broadcast.
Red + blue · blinking
Speaker is in Bluetooth pairing mode, not Auracast mode.
Blue · solid
Speaker connected directly as a Bluetooth speaker.

Published limits

Speaker range
Up to 100 m / 328 ft line of sight.
Bluetooth source range
Up to 15 m / 50 ft.
Speaker playtime
Up to 8 hours.
Typical latency
About 60 ms; not for ultra-low-latency monitoring.

Firmware update

Update Harmony A1

1. Update one Harmony A1 speaker

Update the speakers one at a time. Complete all three steps for one speaker before connecting the next speaker.

  1. Open the Firmware Update Tool on a Windows/Mac computer.

  2. Connect one Harmony A1 speaker to your computer with a USB data cable.

  3. Run the updater. Follow its instructions and keep one Harmony A1 speaker connected until it says Complete.

2. Update the Harmony A1 transmitter

  1. Open the Firmware Update Tool on a Windows/Mac computer.

  2. Connect the Harmony A1 transmitter to your computer with a USB data cable.

  3. Run the updater. Follow its instructions and keep the Harmony A1 transmitter connected until it says Complete.

After updating each device, reset it before continuing.

Still need help?

Get help with Harmony A1

Include the audio source, selected input, speaker MODE light, and steps already tried.

Product support

Send us your issue

A Venucast support agent can review your Harmony A1 setup details and attachments.

Submit a ticket →

Contact support directly

Email or call us

Was this helpful?