INTERACTIVE USER GUIDE · OASIS AURA

Broadcast one source. Everyone can listen.

Connect one audio source, then broadcast it to compatible Auracast hearing aids, headphones, earbuds, receivers, or speakers.

Venucast Oasis Aura Auracast transmitter
1

POWER

Connect power

Connect the supplied USB-C cable and power adapter. Then switch Oasis Aura to ON.

Expected: the device indicators turn on.
No lights? Reseat the power cable. Try the supplied adapter and another outlet.
2

AUDIO SOURCE

What are you connecting?

Choose one. The matching instructions appear immediately below.

TV / Media Device

For a TV or media device with Optical Out.

Mixer / AV System

For a mixer, PA system, or other analog audio output.

Phone / Tablet / Computer

Send audio to Oasis Aura through Bluetooth.

Connect Optical

  1. Remove the clear caps from both cable ends.
  2. Connect Optical Out on the TV/source to Optical on Oasis Aura.
  3. Select Optical on Oasis Aura.
  4. On the TV/source, select Optical output and set the format to PCM.
Expected: the audio indicator responds and listeners hear the TV audio.
No sound? Use Optical Out, not In. Set the format to PCM—not Dolby, DTS, Bitstream, or Auto.
Not sure how to set PCM?Open the Brand-by-Brand TV Guide →

Mixer / AV System

Choose the correct output and cable. The wrong cable may cause low volume, missing vocals, or poor sound quality.
  1. Select AUX Input
    Press AUX/OPT on Oasis Aura until AUX is selected.
  2. Check the Source Output
    Look for XLR, 6.35 mm, RCA, or 3.5 mm output ports.
  3. Choose Your Output
    Select the matching option below.

How many XLR outputs will you use?

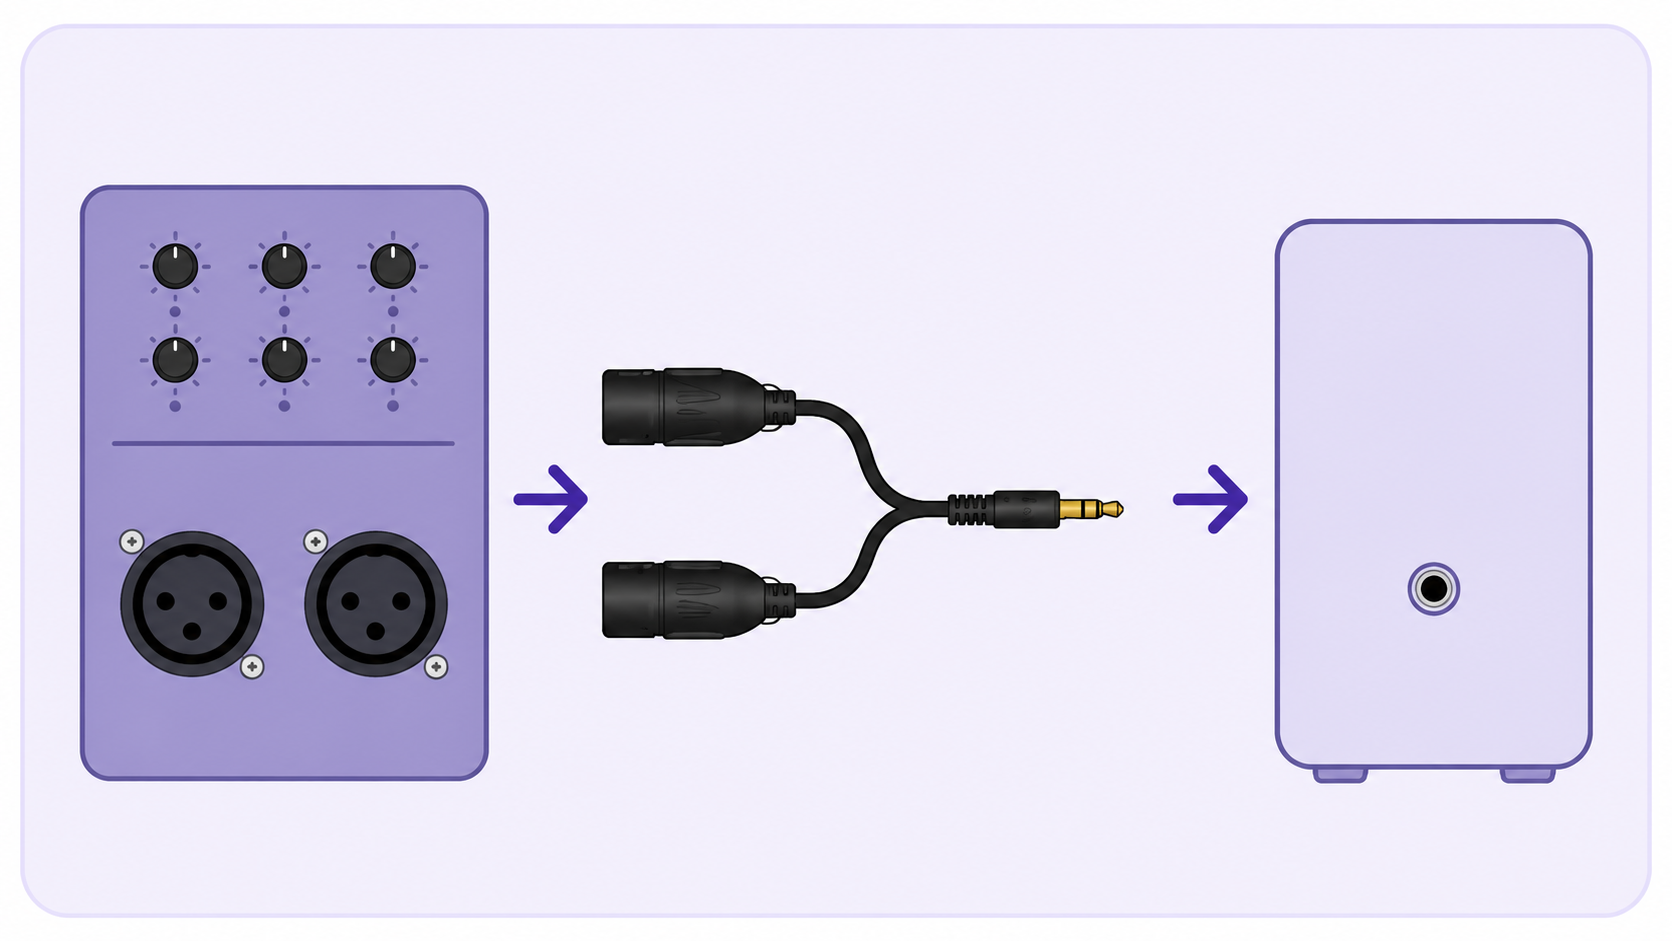
Dual XLR Output

Important: Use a dual XLR female-to-unbalanced 3.5 mm TRS cable. The wrong cable may cause low volume or missing vocals.
  1. Connect the XLR plugs to mixer Output L / R.
  2. Connect the 3.5 mm plug to Oasis Aura AUX In.
Dual XLR mixer outputs connected to Oasis Aura AUX In
Cable not included. Buy separately if needed →

Single XLR Output

Important: A single XLR output is mono. Use a single XLR female-to-unbalanced 3.5 mm TRS cable.
  1. Connect the XLR plug to the mixer Output.
  2. Connect the 3.5 mm plug to Oasis Aura AUX In.
Single XLR mixer output connected to Oasis Aura AUX In
Cable not included. Buy separately if needed →

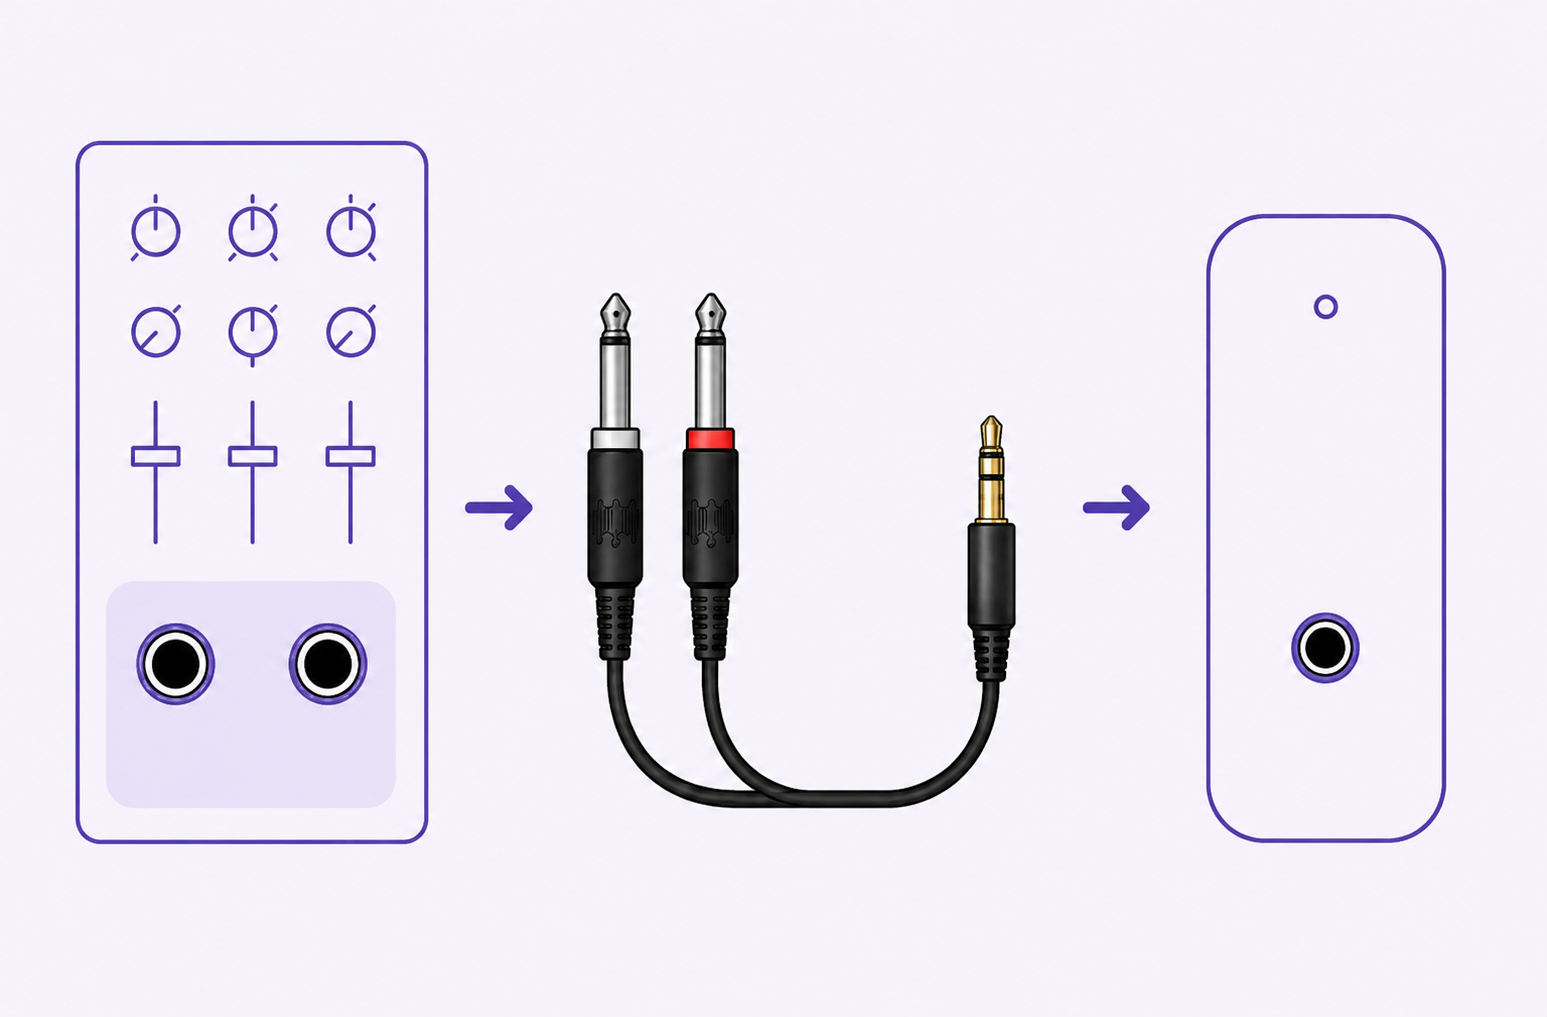
6.35 mm Output

Check the cable type. Use a dual 6.35 mm-to-3.5 mm cable.
  1. Connect the two 6.35 mm plugs to mixer Output L / R.
  2. Connect the 3.5 mm plug to Oasis Aura AUX In.
Dual 6.35 mm mixer outputs connected to Oasis Aura AUX In
Expected: the audio indicator responds and listeners hear clear stereo audio.

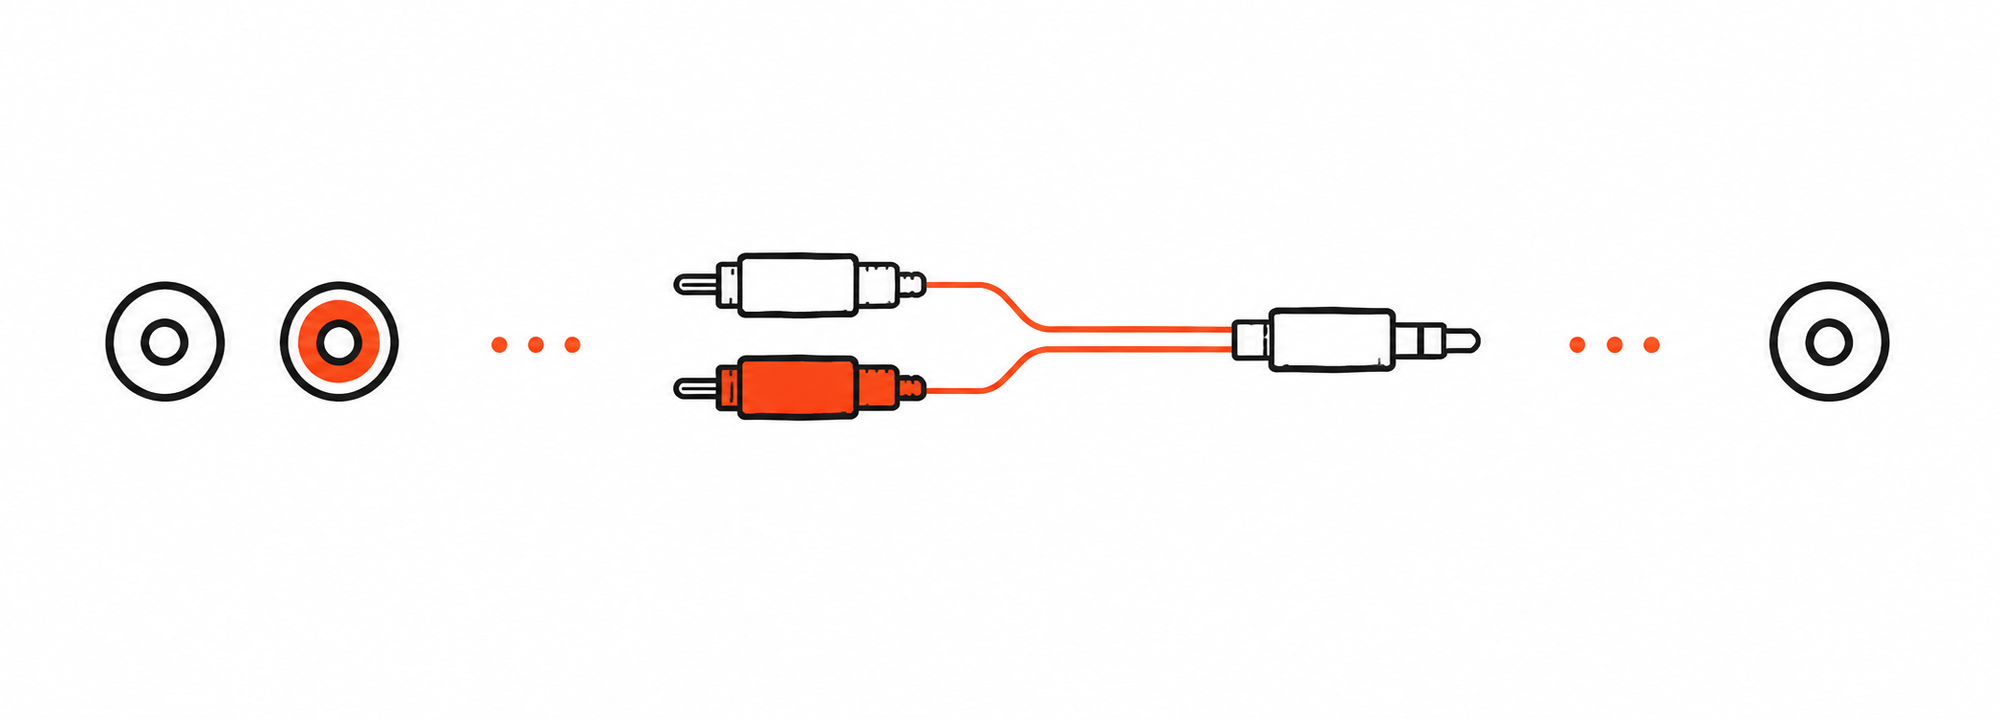
RCA / 3.5 mm Output

Choose the matching output. Connect only an audio output to Oasis Aura AUX In.
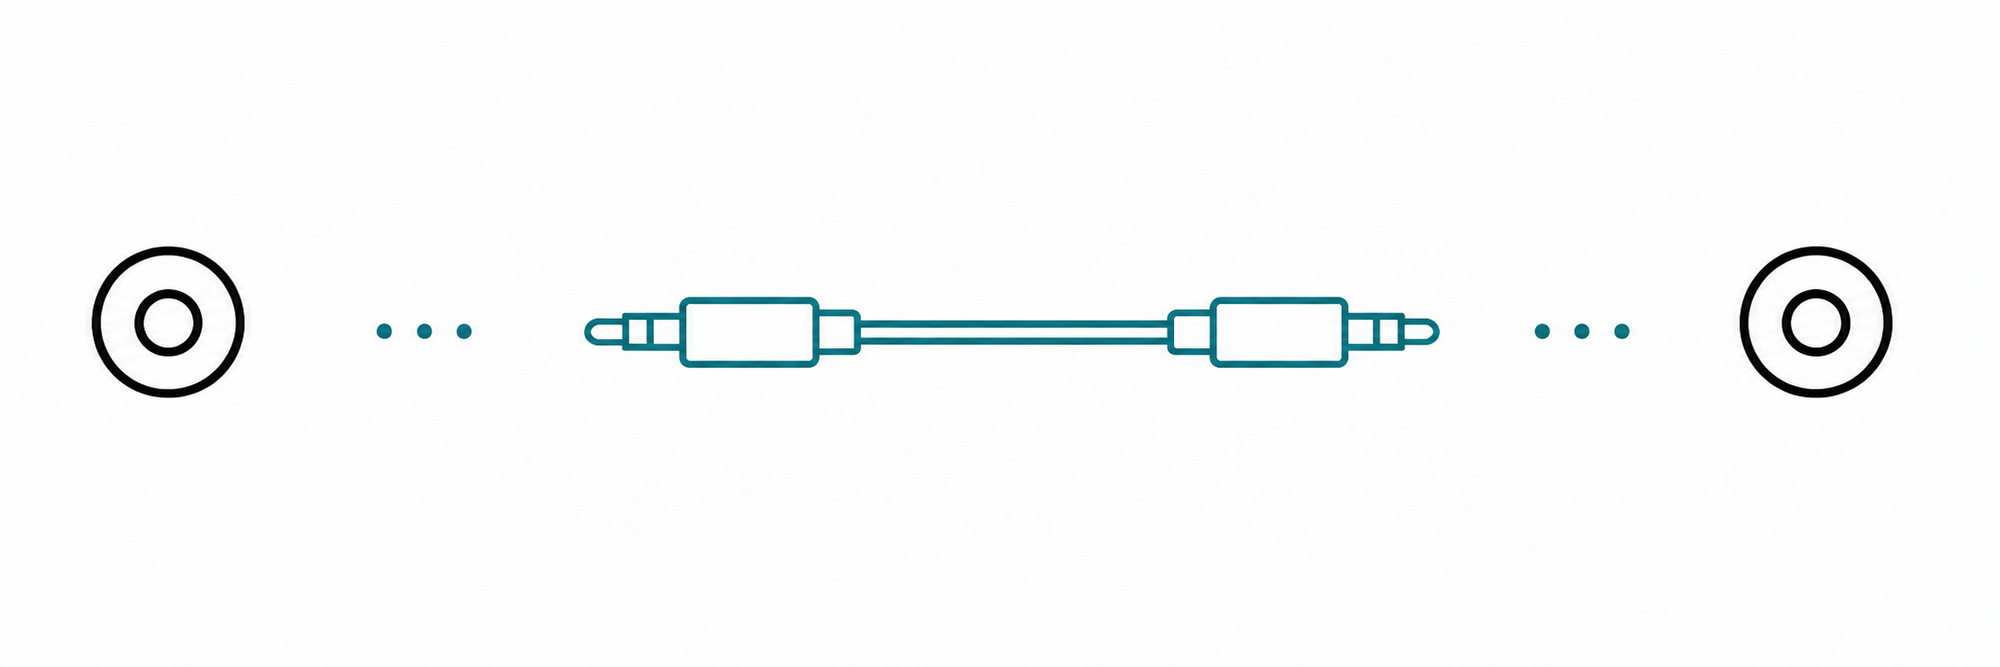
3.5 mm Output

Use the included 3.5 mm-to-3.5 mm cable.

3.5 mm audio output connected to Oasis Aura AUX In
Expected: the audio indicator responds and listeners hear clear audio.

Connect With Bluetooth

  1. Start Pairing
    Select Bluetooth Input on Oasis Aura.
  2. Connect Your Source
    Open Bluetooth settings and select Oasis Aura.
  3. Play Audio
    Start playback on the phone, tablet, or computer.
Expected: the audio indicator responds and listeners hear the source audio.
How It Works: Bluetooth sends audio to Oasis Aura. Listeners receive it through Auracast.
Oasis Aura Not Listed? Turn off Bluetooth on its previous source. Start pairing again and move the devices closer.
3

AURACAST LISTENERS

Join with a listener

Each compatible listener joins the Oasis Aura broadcast.

Auracast hearing aids

Join through the hearing-aid app or supported phone Auracast assistant.

Other Auracast receivers

Compatible Auracast headphones, earbuds, receivers, and speakers can join.

Regular Bluetooth / older hearing aids

These cannot receive the broadcast directly.

Join with hearing aids

  1. Confirm your exact hearing-aid model supports Auracast. Update its firmware and app.
  2. Turn on Bluetooth on the paired phone.
  3. Open the app's Auracast or Broadcast menu. You can also use a supported Android Auracast Assistant.
  4. Scan, select Oasis Aura, then join.
Brand or model not shown? Check the exact model; compatibility varies. If it supports Auracast but is not listed, follow the manufacturer's current joining guide.
Philips HearLink 9050: verify the regional model, app, and firmware. If menus differ, use the Philips guide and checker below. Still stuck? Send Support screenshots.

Use another Auracast receiver

Any compatible Auracast receiver can join, regardless of brand.

  1. Start Auracast scan/join mode on the receiver.
  2. Select Oasis Aura. Automatic receivers may join an open broadcast by themselves.
  3. Confirm the receiver shows joined and plays audio.
Cannot find it? Confirm the receiver supports Auracast—not only Bluetooth. Move closer and update both products. Using a passcode? Check support for encrypted broadcasts.

Add a compatible receiving path

Regular Bluetooth devices cannot join Oasis Aura directly.

  • Wired headphones: add an Auracast receiver such as AuraClip.
  • T-coil hearing aids: use an Auracast-to-neckloop receiver.
  • No Auracast or T-coil: use an Auracast receiver with headphones.
Do not choose by brand alone. Compatibility depends on the exact model and enabled features.

PC TOOL · OPTIONAL

Change advanced broadcast settings.

The tool layout can change. Open the Oasis Aura device page first, then choose Advanced.

Open the correct screen

  1. Install the latest Windows or macOS updater from the official Oasis Aura firmware page.
  2. Connect Oasis Aura directly to the computer with a USB data cable and switch it on.
  3. Open the updater and select Oasis Aura from the device list.
  4. Open Advanced on the Oasis Aura device screen—not on the updater home screen.
  5. Change only the needed setting, apply/save it, and wait for confirmation before disconnecting.
Updater → Oasis Aura device page → Advanced

If your computer does not show Advanced

  • Download the updater again so the app itself is current.
  • Use a known USB data cable; a charge-only cable can power the unit without exposing device controls.
  • Connect directly, not through a hub, and keep Oasis Aura powered on.
  • Close and reopen the updater after reconnecting.
  • If an option moved or was removed, follow the current firmware page instead of an older screenshot.
Still missing? Send Support your computer OS, updater version, Oasis Aura firmware version, and a screenshot of the device screen.

FIX A PROBLEM

Start with what you see.

Choose the symptom that matches. Each fix shows what to check and what success looks like.

Oasis Aura does not power up

Recognition: no indicators turn on after the switch is set to ON.

Action: reseat USB-C, use the supplied power adapter, test another outlet, then try a known working power/data cable.

Expected: indicators turn on. If not, disconnect all audio cables and retry power only.

Escalate: contact support with the adapter rating, cable used, and whether any indicator flashes briefly.

Listeners cannot find the Oasis Aura broadcast

Recognition: Oasis Aura is powered, but the listener's scan has no Oasis Aura entry.

Action: confirm Auracast support. Update both devices and apps. Move closer, then scan from the receiver's Auracast menu—not regular Bluetooth settings.

Expected: the broadcast name appears and can be joined.

Escalate: provide the exact receiver/hearing-aid model, app version, distance, and Oasis Aura LED state.

The broadcast is visible but will not join

Recognition: Oasis Aura appears, but selection fails or returns to scanning.

Action: if a passcode is on, confirm encrypted Auracast support and enter it exactly. Otherwise restart both devices and retry nearby.

Expected: the receiver reports joined/connected and audio plays.

Escalate: temporarily test an open broadcast only if permitted by your venue, then report whether that changes the result.

Joined, but there is no audio

Recognition: the listener is joined but silent.

Action: match the Oasis Aura input to the cable. Optical: use Optical Out + PCM. AUX: unmute and raise the source. Bluetooth: route playback to Oasis Aura.

Expected: the audio-input indicator responds and sound reaches the listener.

Escalate: test another source/input and report which combination works.

The PC app does not match this guide

Recognition: the app opens, but Advanced or the shown options are absent.

Action: update the updater, use a data cable, select the Oasis Aura device page, and check there for Advanced. Older screenshots may not match the current tool layout.

Expected: product-specific controls appear after Oasis Aura is detected.

Escalate: send Support the OS, app version, device firmware version, and a screenshot—do not guess at hidden settings.

FIRMWARE UPDATE

Update Oasis Aura safely.

Firmware updates are optional during normal setup. Update only for a relevant release or when Venucast Support recommends it.

  1. 1Download the latest updaterUse the official product-specific firmware page.
  2. 2Connect Oasis AuraUse a direct USB data connection and keep the transmitter powered on.
  3. 3Run and finishFollow the app, wait for confirmation, then restart Oasis Aura.

During an update: do not unplug Oasis Aura, close the updater, or turn off the computer.

STILL NEED HELP?

Get the right help for Oasis Aura.

Include the source and listener models, selected input, LED state, computer OS, and helpful screenshots.